
How to Deep Clean Your Oven
Introduction
Most people shy away from the idea of cleaning their ovens. Just because you cannot see what’s happening inside, you ignore the matter altogether. However, leaving an oven uncleaned for months can cause dirt and grime to accumulate in the inner walls. This creates various health and safety hazards for you and your family. Before you think it’s impossible to clean it by yourself and start Googling “cleaning services near me”, know that you too can deep clean an oven by yourself, and here are a few ways to do so:
The Details
- Identify Your Oven- All ovens aren’t the same. They either have more or fewer functionalities or are built using different materials. As a result, not all of them require the same effort when it comes to cleaning. So, by knowing the type you will be able to know just how much work is cut out for you. Usually, ovens are divided into different categories, self-cleaning, non-self-cleaning, and textured.
Self-cleaning ovens are equipped with a self-clean mode that automatically uses a combination of steam and high temperatures to disintegrate food debris into ash. So, all you have to do is activate it. Once the timer runs out, take a brush and sweep off the accumulated residue.
Textured ovens are also called continuous-cleaning ovens. The interior of a textured oven is made from a special material. It automatically burns off food and doesn’t require a special mode like the self-cleaning ovens. Just give it a good wipe once in a while for proper cleanup.
Non-self-cleaning ovens require elbow grease. You’ll need a proper kit if you plan on cleaning it by yourself. For the remainder of this cleaning guide, you’ll learn how to clean your oven with the right tools.
- Make a List of Cleaning Supplies- You cannot go to war against a grime-infested oven without the right weapons. Let’s have a look at what they are:
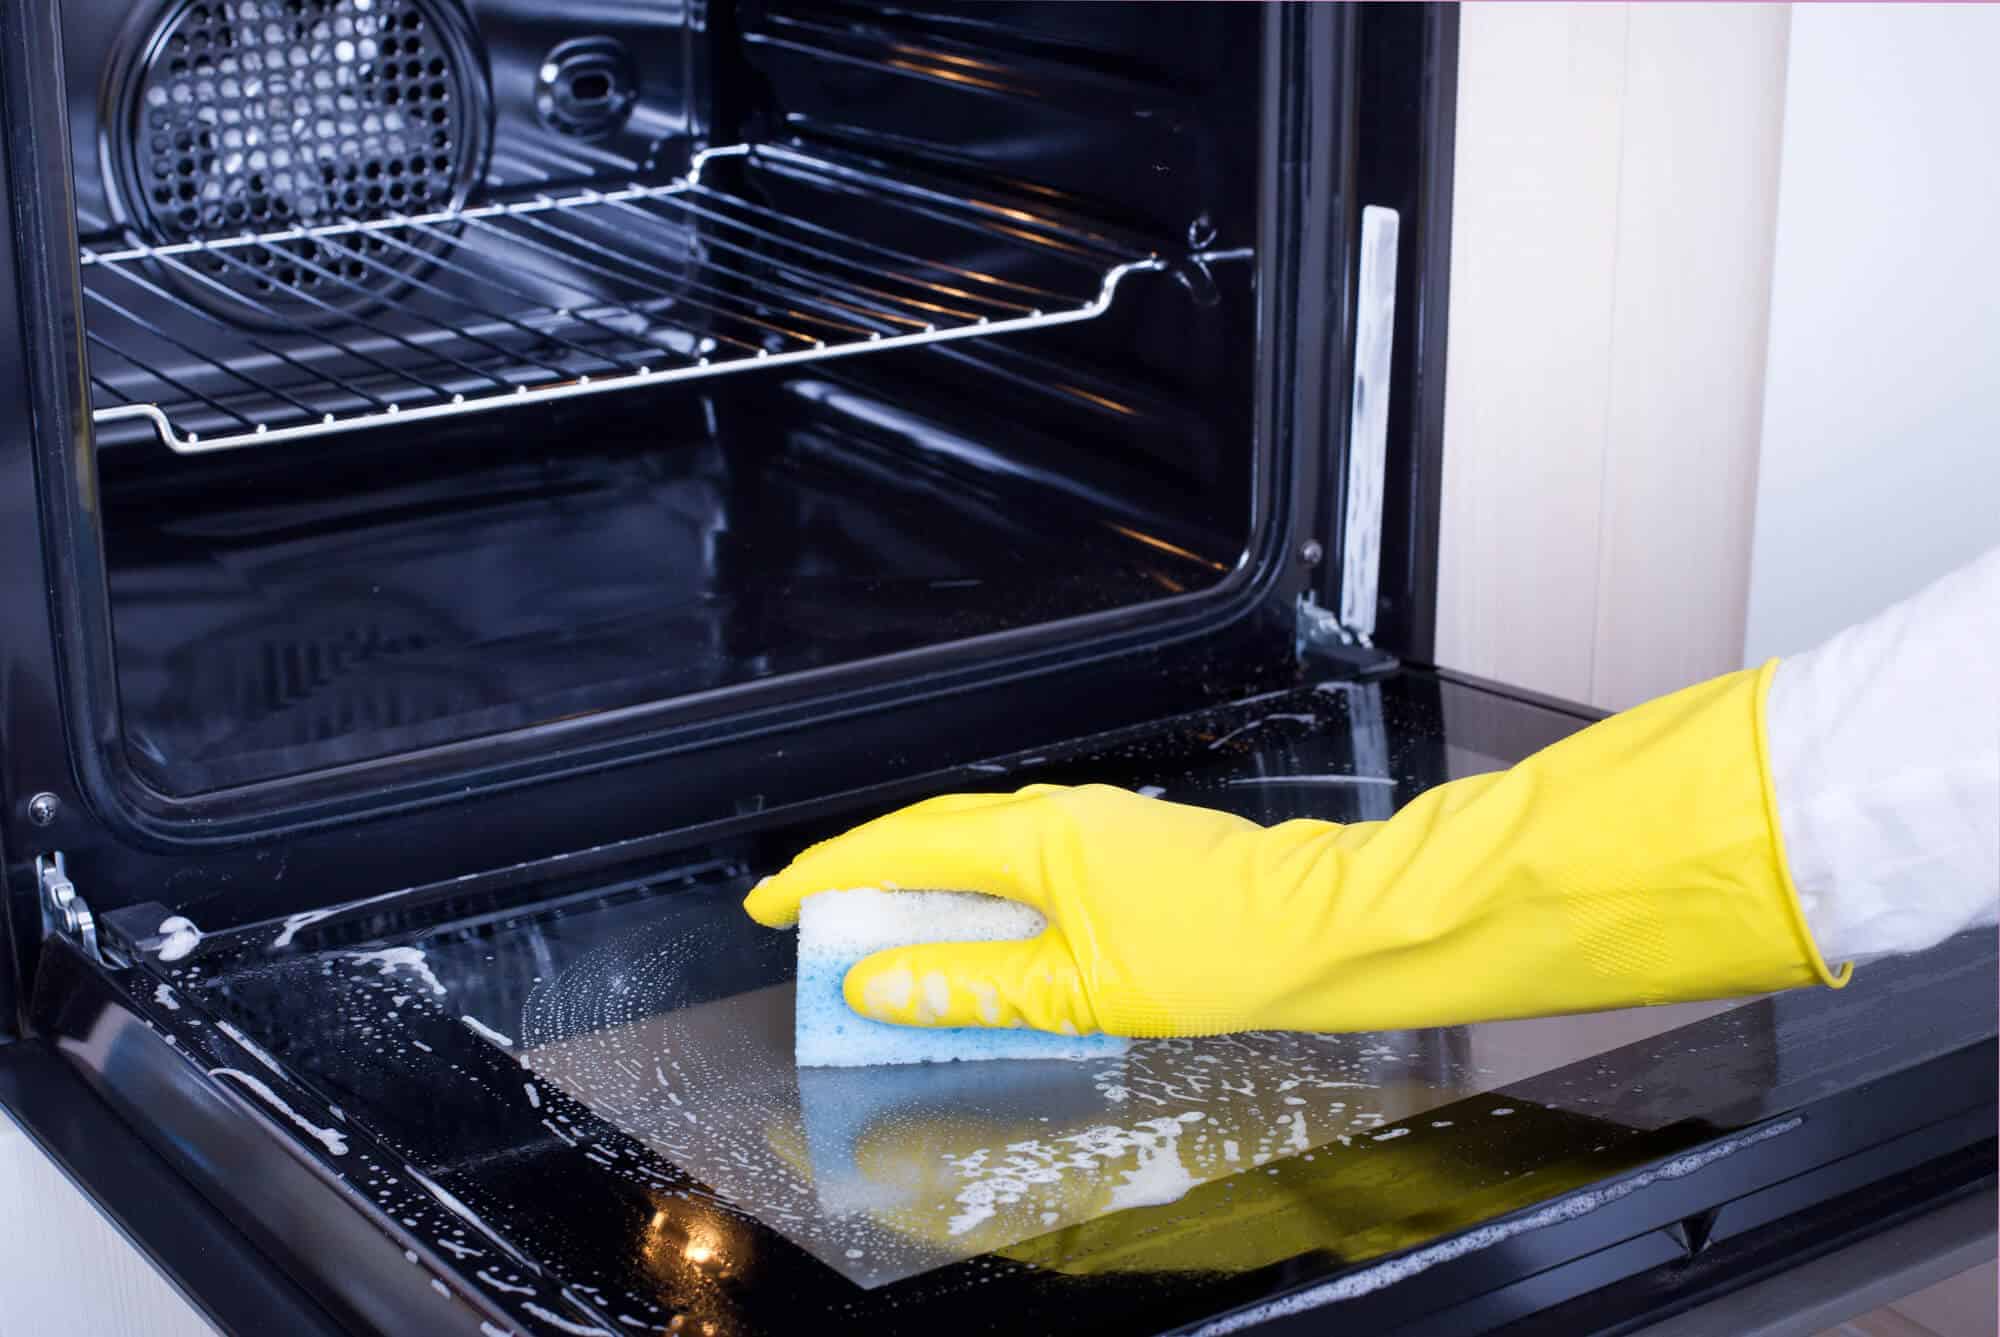
- Kitchen gloves to protect your hands from grease and dirt, especially if you have sensitive skin.
- Some good quality dish soap and water. If you want to use natural ingredients, go with vinegar and baking soda.
- A brush to apply the cleaning reagent in tough to reach corners.
- Scouring pads to gradually rinse the grime.
- Metal spatula to take off the more insistent bits of stains.
- Microfiber cloth to wipe the surface once you are done scraping everything off.
- A multi-surface cleaner for a final round of cleansing.
- Newspapers to soak off remaining water and soap from glass surfaces.
- Prepare Your Oven for the Purge- Start with the oven racks. First, try scrubbing it with some vinegar or dish soap. If the stains aren’t coming off, you will need to soak them overnight. Find a large container since using the bathtub is not recommended. Once you have put in the racks, douse them with baking soda and make sure you don’t miss any tricky corners. You will get a foaming reaction once you start pouring in the vinegar. Once the foaming stops, fill the container with hot or lukewarm water. Leave it overnight or for at least eight hours, and then scrub the racks with soapy water to clean off any remaining stains.
- Starting with the Interior of the Oven- The interior of the oven can be divided into two parts. One is the back of the door and the other is the oven’s interior. Let’s start with the interior first.
If your oven is very dirty, you can spray some hydrogen peroxide inside and let it sit for 10 minutes before proceeding with soap water. While the chemical settles, mix two tablespoons of your choice of cleaning fluid with one-fourth cup of baking soda. Add as much water you need to clean off the grime. Now before you start applying the solution all over the interiors, ensure proper ventilation in the kitchen. Sometimes the cleaning soap gives off harsh nauseating fumes when it touches the dirt inside of your oven. Open the windows and set up a fan to avoid the smell from stagnating in the room.
Apply the cleaning mixture evenly all over the interior of the oven and the back of the door. Leave the solution for at least two hours. However, overnight is a better option, if you can afford it. While you’re seasoning the interiors, remove the burner knobs and soak them in soapy water. The hydrogen peroxide loosens up the baked grease residues, and the dishwasher and baking soda disintegrate the grime so that they can be easily cleaned off.
- Initial Scrapping with a Spatula- Now for the hard part. Spray a little bit of water inside the oven, but don’t overdo it. You will be easily able to scrape off the gunk when the surface is a bit wet. Take the spatula or your preferred scraper and remove as much gunk as possible. Scrubbers and melamine foams do not do a great job at cleaning the larger chunks of gunk. You’re better off using a spatula. It’s easier and more efficient. However, brace yourself as the sight of scraped-off smudge is anything but pretty.
- Cleaning the Remaining Dirt- Now that the larger chunks are taken care of, it’s time to wipe everything clean. Take a damp cloth, scrubber, or melamine foam, whichever you prefer, and start scrubbing. For hard-to-reach corners use a brush. For the back, the glass door uses melamine foam as the scrubber can leave scratches. Use a damp cloth followed by a dry towel to remove every bit of soap and water.
Conclusion
As a finishing touch, you can clean off the entire outside of the oven with a towel and some spray cleaning fluid. As you can see it’s super easy to deep clean your oven, and it should look new by the time you’re done cleaning. Insert the racks back in and start cooking. However, if you cannot afford the time or patience, you can always search for “cleaning services near me” for professional assistance.


![]()