
Network Cabling Services: Installation and Setup Guide
Reliable office connectivity begins with professional network cabling service installation, and understanding the setup process helps businesses make informed decisions from the very first cable pull. Like the unseen framework of a well-built house, structured cabling is the foundation upon which every digital operation depends – invisible when done right, unmistakable when done poorly.
This guide walks through the essentials of network cabling installation, from planning and design to testing and handover, tailored for businesses operating in Singapore’s commercial landscape.
Why Proper Cabling Installation Matters
In an era where businesses rely on cloud computing, video conferencing, VoIP telephony, and high-volume data transfers, the quality of the physical network infrastructure determines the ceiling of performance. No amount of bandwidth from an internet service provider can compensate for poorly installed cables, loose connections, or an unstructured layout.
A professional installation ensures consistent speeds, minimal downtime, and a system that scales with the business. It also reduces long-term maintenance costs, because a well-organised cabling system is far easier to troubleshoot and upgrade than a tangled web of ad hoc connections.
Step One: Site Survey and Network Assessment
Every installation begins with a thorough site survey. The cabling contractor visits the premises to assess the physical layout, identify the locations where data points are needed, and evaluate the existing infrastructure.
During this assessment, the contractor considers:
- The number of workstations and devices that require wired connections
- The location of the server room or network cabinet and its proximity to end points
- Building infrastructure constraints such as floor voids, ceiling spaces, and cable tray routes
- Future expansion needs to ensure the design accommodates growth
“A proper site survey saves more money than any other step in the process, because it prevents costly changes once installation has started,” notes James Teo, a data cabling specialist who has overseen ethernet installation projects across more than 150 commercial buildings in Singapore.
Step Two: Design and Cable Selection
Based on the site survey, the contractor designs the cabling layout. This design specifies the cable routes, the type and quantity of cables, the locations of patch panels and network cabinets, and the termination points at each workstation.
Common Cable Types Used in Office Installations
- Cat 6 – Supports speeds up to 1 Gbps at 100 metres, suitable for most office environments
- Cat 6A – Supports speeds up to 10 Gbps at 100 metres, ideal for data-intensive operations
- Fibre optic – Used for backbone connections between floors or buildings, offering superior speed and distance
The choice of cable depends on the business’s current and anticipated bandwidth requirements. For most small to medium offices, Cat 6 provides an excellent balance of performance and cost. Larger enterprises or businesses with heavy data demands may benefit from Cat 6A or a hybrid approach combining copper and fibre.
Step Three: Cable Routing and Installation
With the design approved, the physical installation begins. This is where craftsmanship truly shows. Cables are routed through ceiling voids, floor trunking, or wall conduits, following the planned pathways to each data point.
Key practices during installation include:
- Maintaining cable bend radius – Excessive bending degrades signal quality and shortens cable life
- Avoiding electromagnetic interference – Keeping data cables away from power lines and fluorescent lighting
- Using cable management accessories – Trays, ties, and labels keep the installation organised and accessible
- Following fire safety regulations – Using fire-rated cables and ensuring proper firestop sealing at penetration points
In Singapore’s commercial buildings, structured cabling installation must comply with building management rules regarding access hours, ceiling penetrations, and fire safety. The contractor coordinates with building management throughout the process.
Step Four: Termination and Patching
Once cables are routed, they are terminated at both ends. At the workstation side, cables are connected to wall-mounted faceplates or floor boxes. At the network cabinet end, they are terminated onto patch panels.
Proper termination is critical. Each cable must be stripped, arranged, and punched down according to the TIA/EIA wiring standard. A single miswired pair can cause intermittent connectivity issues that are difficult to diagnose without proper testing equipment.
The patch panel serves as the central hub, connecting each workstation to the network switch. This arrangement allows the IT team to manage connections easily, reassign ports, and troubleshoot issues without disturbing the permanent cabling.
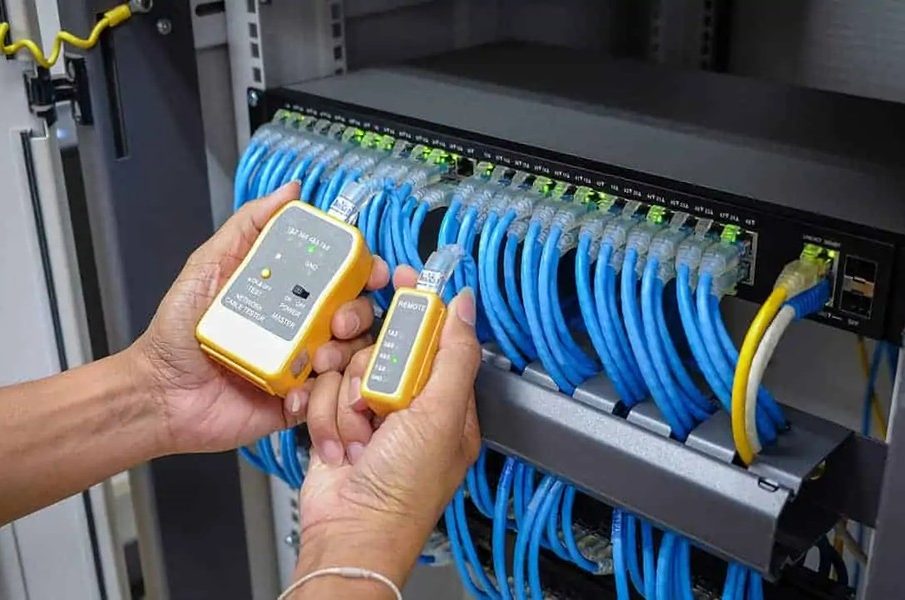
Step Five: Testing and Certification
Every installed cable must be tested before the system is commissioned. Professional network cabling service providers use certified cable testers to verify that each link meets the performance specifications for its category.
Tests typically measure:
- Wire mapping – Confirms correct pin-to-pin connections
- Length – Ensures the cable does not exceed the maximum allowable distance
- Insertion loss – Measures signal attenuation across the link
- Near-end crosstalk – Checks for signal interference between adjacent pairs
- Return loss – Evaluates impedance consistency along the cable
Each tested cable receives a pass or fail result. Failed cables are re-terminated or replaced. Upon completion, the contractor provides a test report for every link, which serves as the certification record for the installation.
Step Six: Documentation and Handover
A professional installation concludes with comprehensive documentation. This includes floor plans showing cable routes and data point locations, a port labelling schedule, test reports, and a bill of materials listing all components used.
This documentation is invaluable for future maintenance, upgrades, and troubleshooting. It transforms the IT cabling system from an opaque collection of wires into a clearly mapped infrastructure that any qualified technician can work with.
Good documentation also protects the business during office relocations or reinstatement works, as it provides a clear record of what was installed and where.
From the initial survey to the final handover, professional network cabling service installation is a disciplined process that rewards careful planning and skilled execution in every network cabling service engagement.


![]()