How to Install a Backsplash: A Step-by-Step Guide to a Fresh, Functional Kitchen
A backsplash is an easy way to update the look of your kitchen without undertaking a complete overhaul. Not only does it protect your walls from water, steam, grease, and food stains, but it also adds color, pattern, or texture. Whether you’re doing a full kitchen renovation or just a small refresh, the best results come when you combine your design preferences with the technical considerations involved.
A gorgeous tile isn’t the only thing that determines how a backsplash looks and performs. The underlying wall, pattern, grout, edging, and sealing also play an important role.
Why a Backsplash Is Important
The wall behind your sink or cooktop takes a lot of punishment. Moisture, heat, grease, and cleaning chemicals can quickly damage unpainted walls. A properly installed backsplash provides a protective, easy-to-clean surface. It also acts as a unifying element between your benchtops, cabinets, floors, fixtures, and appliances. A quality backsplash installation offers the following benefits:
- Increased protection against splashes and spills behind your sink and cooktop
- Improved hygiene and ease of cleaning
- A clean, seamless transition between your benchtops and walls
- Added interest through texture, color, or contrast
- A more finished and cohesive overall aesthetic
The aim isn’t simply to enhance the visual appeal of the wall. It’s also to improve the functionality of your kitchen.
Selecting the Best Backsplash Material
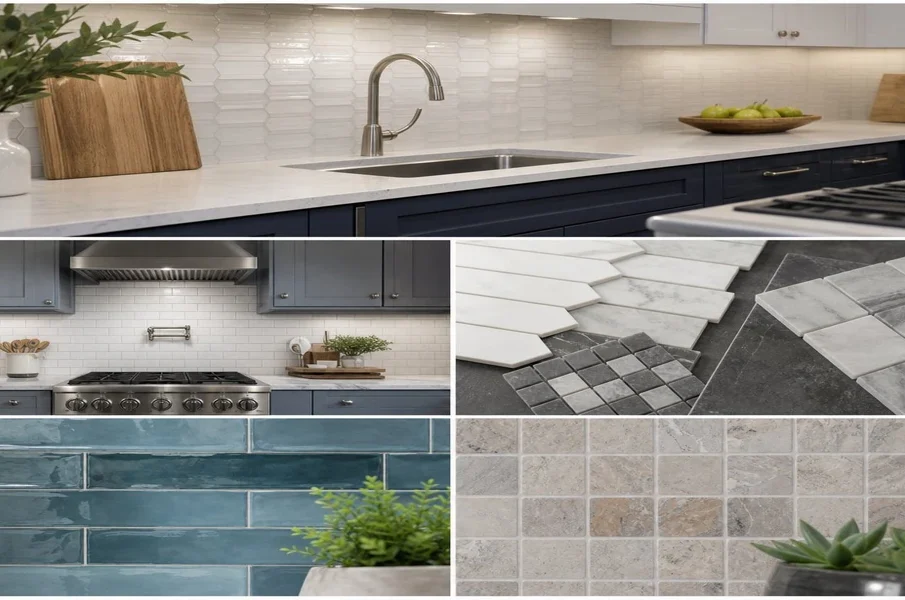
Tile is a popular backsplash choice because it’s durable, highly versatile, and comes in an array of styles and finishes. Ceramic and porcelain tiles (there is a helpful breakdown at https://www.britannica.com/technology) are ideal for kitchens due to their resistance to moisture and relative ease of cleaning. Glass backsplashes are great for lightening a dark space, while natural stone provides a more organic, textured look.
Maintenance should be considered as much as aesthetics. While high-gloss tiles are generally easy to clean, they may also show fingerprints more readily. Matte tiles might provide a soft, muted look, but certain types are harder to keep clean. Natural stone typically requires sealing to prevent staining.
Consider the way you use your kitchen on a daily basis. If you frequently cook on your stovetop, opt for a material that can stand up to grease, heat, and frequent cleaning.
Planning the Pattern
One of the biggest factors in achieving a professional-looking backsplash is getting the layout right. Before you start, the wall should be measured and the pattern designed. You’ll want to consider where the tiles start and end, where they meet the cabinetry, and where the cuts occur around electrical sockets, corners, windows, and open shelves. A common design technique is to center the pattern directly behind your sink or cooktop. Leaving small slivers of tile at the end of a run is another issue that can make the finished job look less professional.
“Most backsplash issues are down to planning, rather than the tile,” says Daniel Mercer, residential tiling consultant. “If you know what you’re doing and have a good plan for your layout, the tiles will cut cleaner, there’ll be less wastage, and the finished product will look better.”
It can also help to lay out a small area of the backsplash (without any adhesive or grout) to see how things go before you commit to the full installation.
Preparing the Wall
For a successful backsplash install, you’ll need a clean, solid surface. The wall needs to be dry, smooth, and free of grease, dirt, flaking paint, and any other debris. You can’t even ignore slight imperfections, as these could cause your tile to sit unevenly.
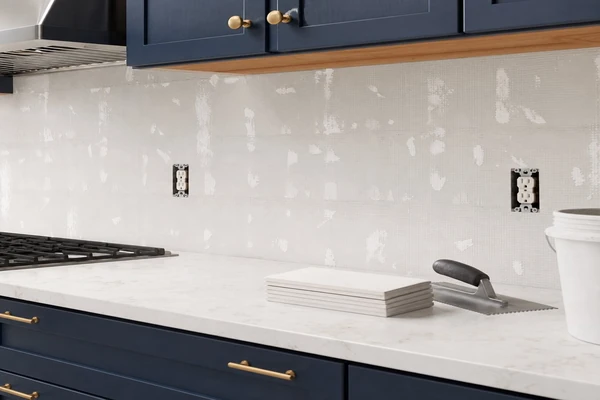
Typical prep work includes:
- Removing flaking paint or existing splashback.
- Scrubbing away grease or grime.
- Repairing any holes, cracks, or imperfections in the wall.
- Ensuring the wall is sufficiently flat for tiling.
- Marking a guide line for your first row of tile.
This process might seem like a quick chore, but it can mean the difference between a nice, tidy backsplash and one with tiles that fall off, shift out of alignment, or crack over time.
Grout, Edge Treatment, and Finishing Touches
The grout you use will influence how the backsplash looks and performs. Matching the grout to the color of your tile will give you a more understated, homogeneous appearance, whereas a contrasting grout will draw attention to the tile shape or design.
Grout lines play a role, too. If you’re after a clean, minimalist look, then narrower grout lines might suit you better, while wider lines can complement the character of a more rustic or textured tile. If the backsplash is exposed to steam and moisture (as discussed here), choosing the right grout and installing it properly will go a long way to prevent staining and moisture-related damage.
Finally, you’ll want to think about how you’ll treat any exposed edges before you start installing your tiles. If you don’t do this well, then any exposed edge might look like a sloppy afterthought. Depending on the type of tile and the design of your kitchen, you can finish exposed edges by using a trim piece, mitering the corner, or cutting the tile to fit.
Where the backsplash meets your benchtop, cabinetry, or an inside or outside corner, flexible sealant will likely be required to accommodate any movement.
A Small Feature With a Big Impact
Installing a backsplash is a functional improvement that can add a lot to the visual appeal of your kitchen. It’ll help protect the wall behind the benchtop, make your kitchen easier to keep clean, and tie together the rest of the room’s finishes. When you choose the right material, create a thoughtful layout, prepare the wall adequately, and pay close attention to finishing touches, your new backsplash can remain a clean, attractive, and durable addition to your home.